Connecting with Monday.com
Connecting with Monday.com: This video is shows connecting the Monday.com with the aiv using the airbyte.
The goal of this document
Here, we are going to connect the vendor called Monday.com to the Airbyte then it will redirect the data using the destination of MySQL, User can choose the format of the destination as required, For example from MySQL/ PostgreSQL, etc.
Useful Resources of Airbyte
- Official Website: https://airbyte.com/
- List of Available sources by the Airbyte: https://docs.airbyte.com/integrations/sources
- Help Center: https://discuss.airbyte.io/new
- How do you install Airbyte: https://docs.airbyte.com/deploying-airbyte/local-deployment
- Refer blog: https://medium.com/@gauravbidata/connecting-the-monday-com-with-aiv-using-airbyte-d8bebd6b19ee
Requirements to get the ‘Monday.com’ source
- User should have an account on Monday.com, if not then signup from the below link: https://auth.monday.com/users/sign_up_new#soft_signup_from_step
- User should have the Personal Access Token of Monday.com
Steps to Fetch the Personal API Token from Monday.com
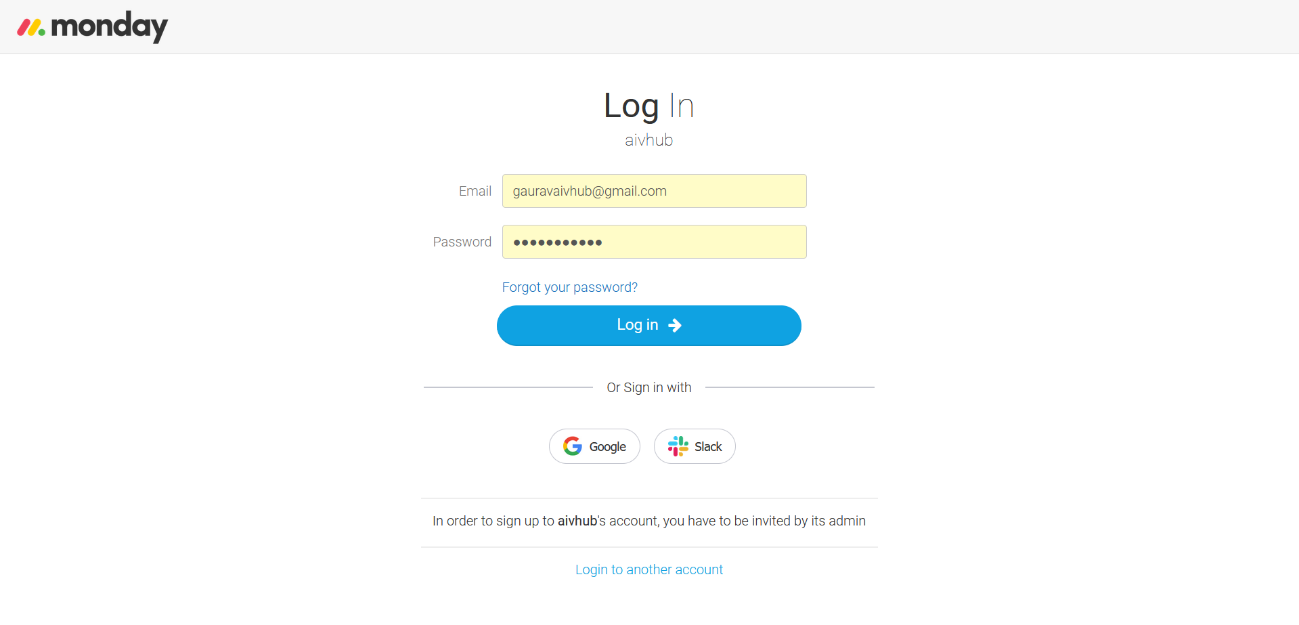
- Go to Monday signup and make a user account: https://auth.monday.com/users/sign_up_new#soft_signup_from_step
- Login with your credentials, as shown in figure the below:
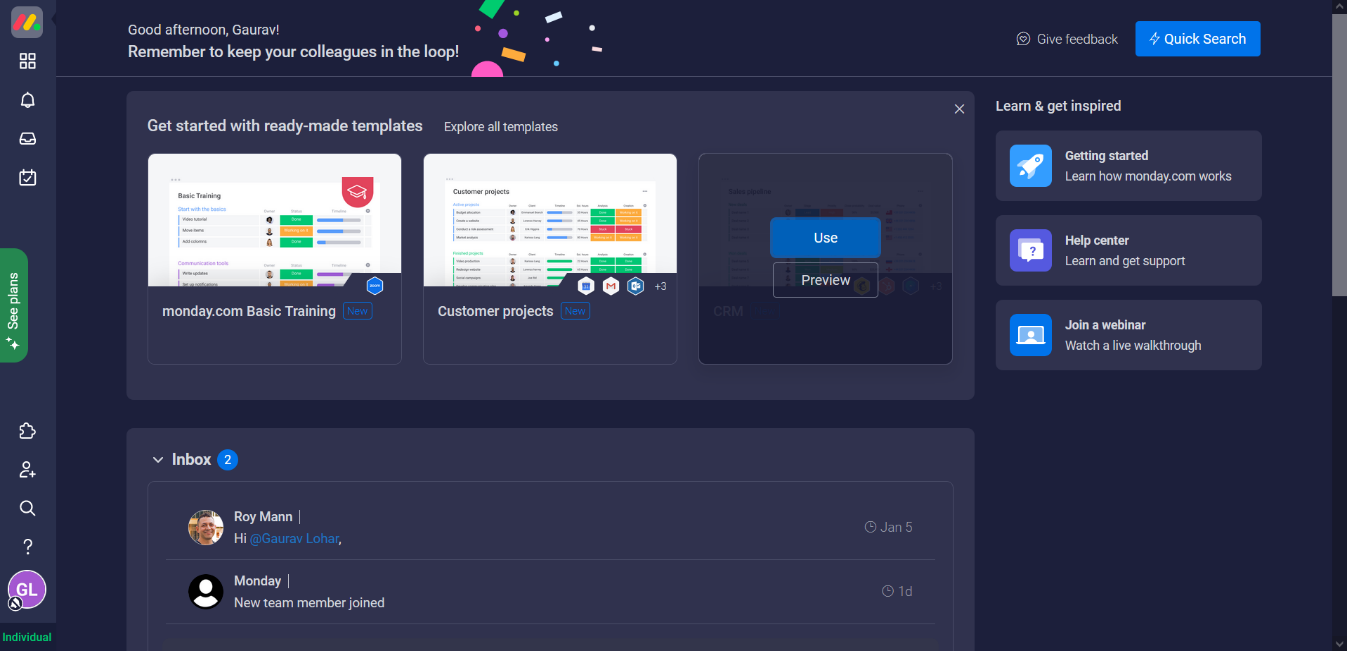
- After login, Got Click on the User icon on the bottom-left side of the screen, as shown in the figure below:
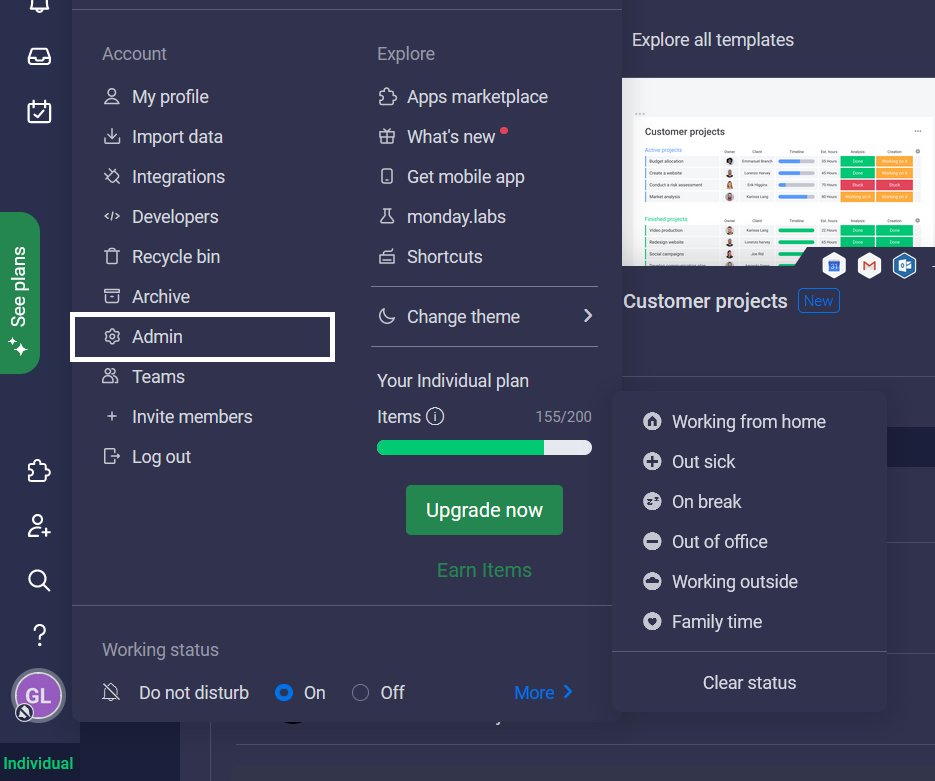
- Click on Admin from the Available options, as shown in the figure below:
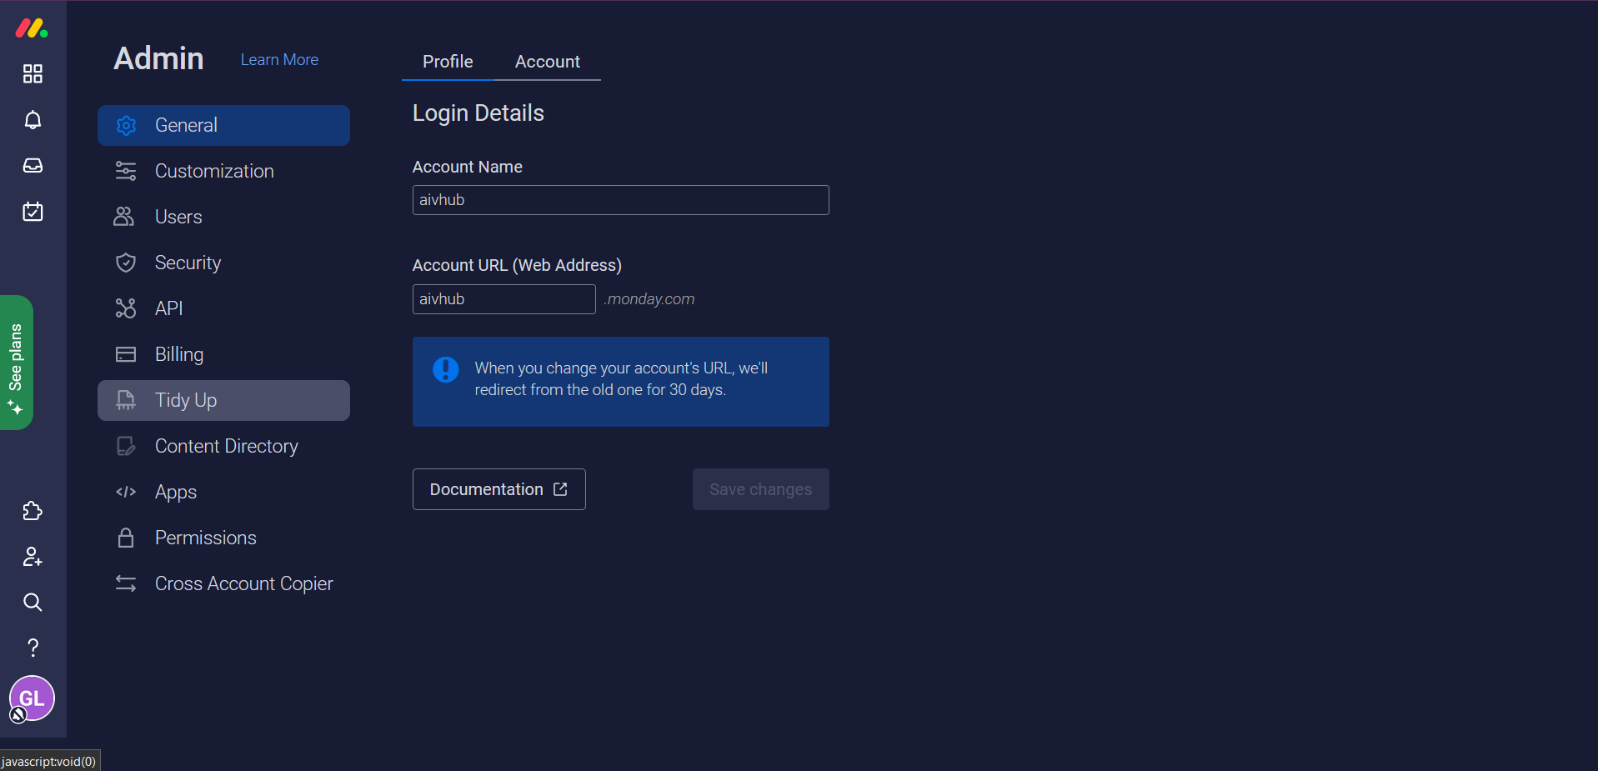
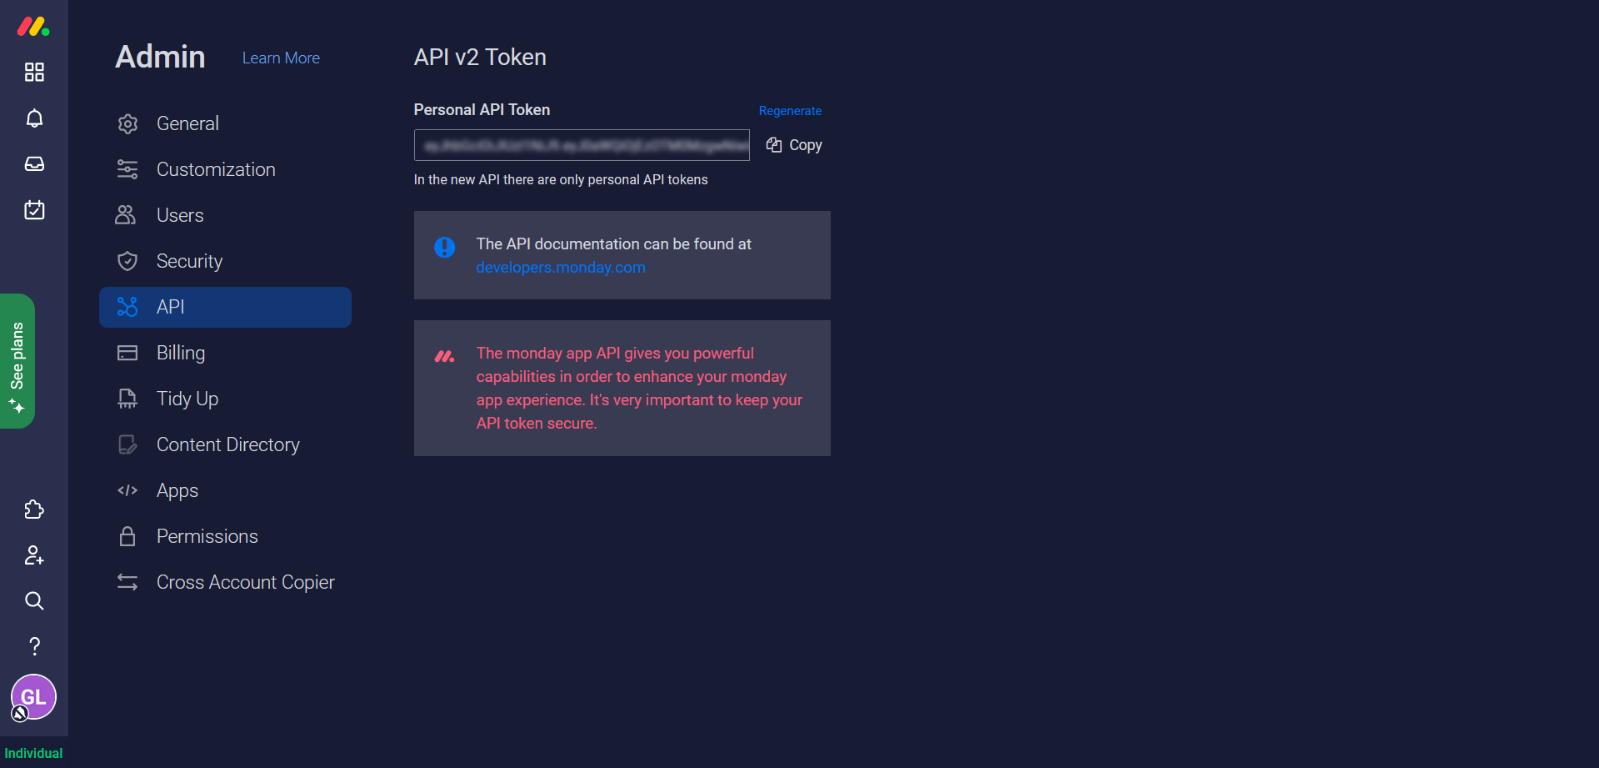
- As You land on the Admin page, Click on The API from the left vertical list menu.
- As You click on the API, it show you the Personal API Token, It stays blurred by default due to security reasons. As shown in the figure below:
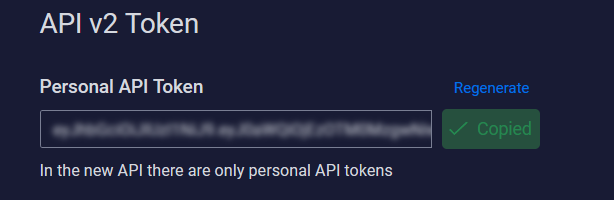
- Click on the copy button to copy the whole API Token
Steps to Connect Monday.com with AIV
Go to the Airbyte using the below link: https://airbyte.com/
The Airbyte landing screen looks like below:
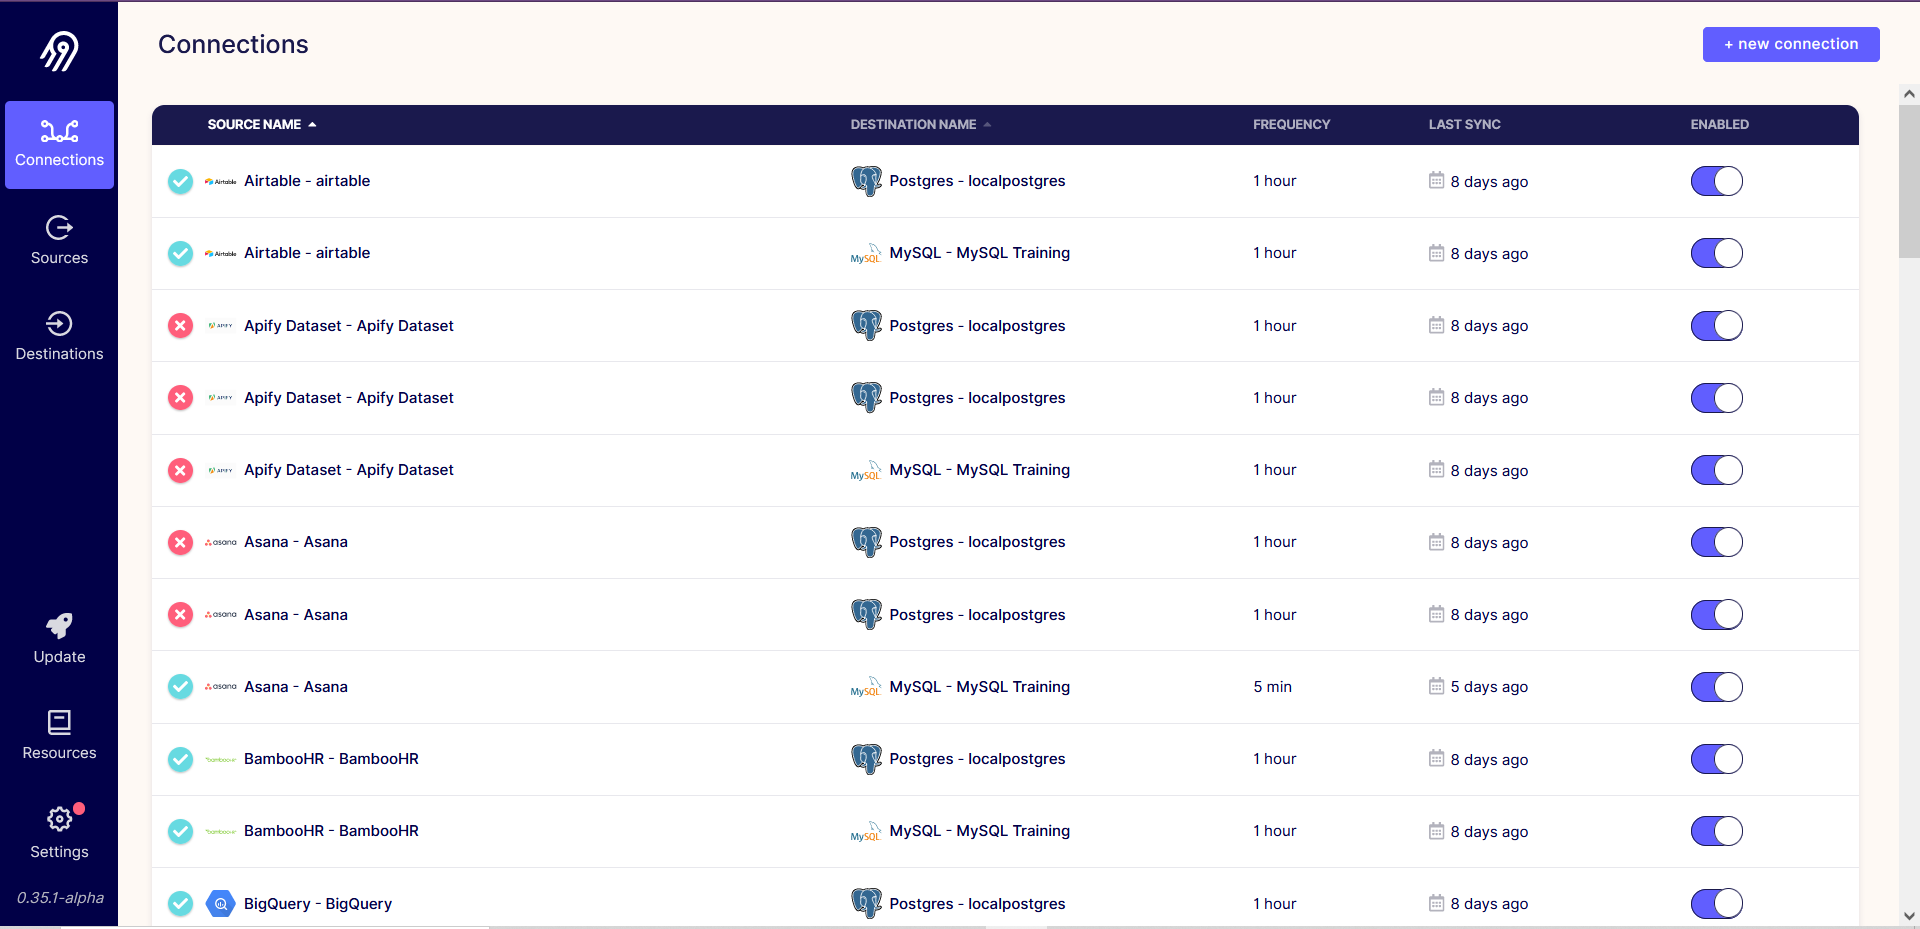
- Here We have 3 options on the left, which contain Connections, Sources, and Destination. As per continuing the steps click on the Sources option.

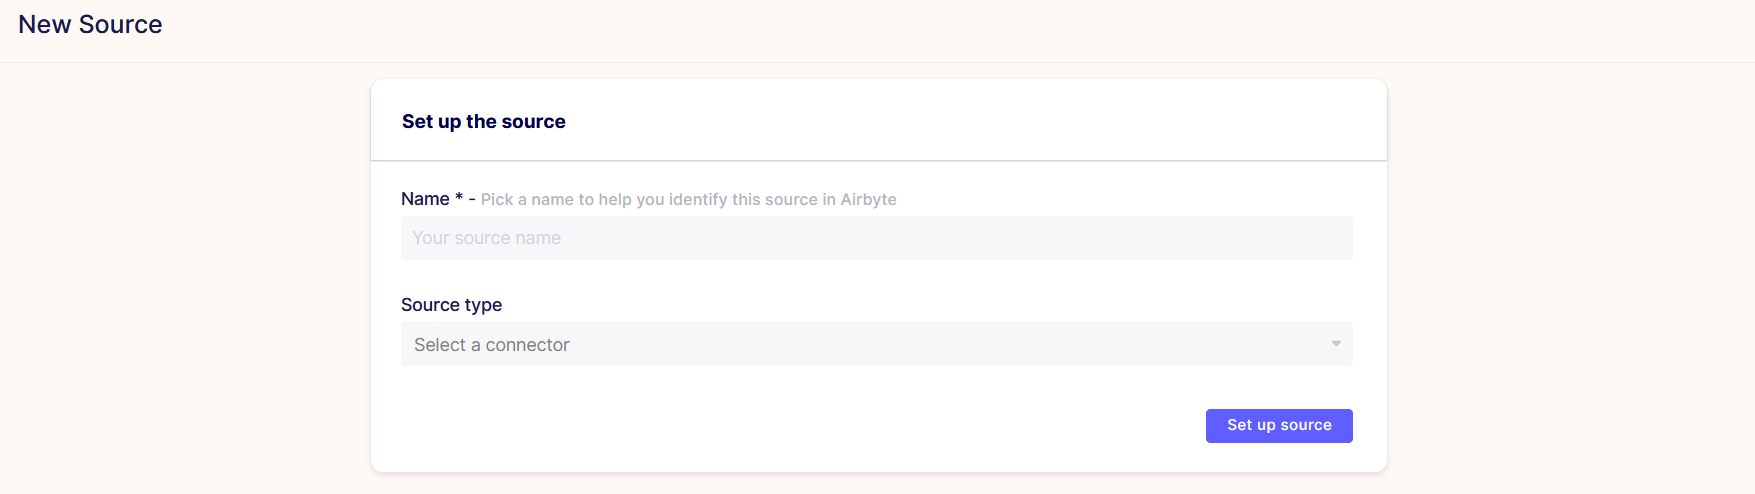
- To add the Monday.com source, click on the New Source button from the Top-right corner.

- To add Any of the sources here, the user needs to add the properties which are needed from the Airbyte, every source has its own individual properties.
Note: Here every source demands a different type of property, where Client DI, Client Secret, and Refresh Tokens are common in most sources. on that we can say, all the sources are different from each other.
- Set up source Form overview:
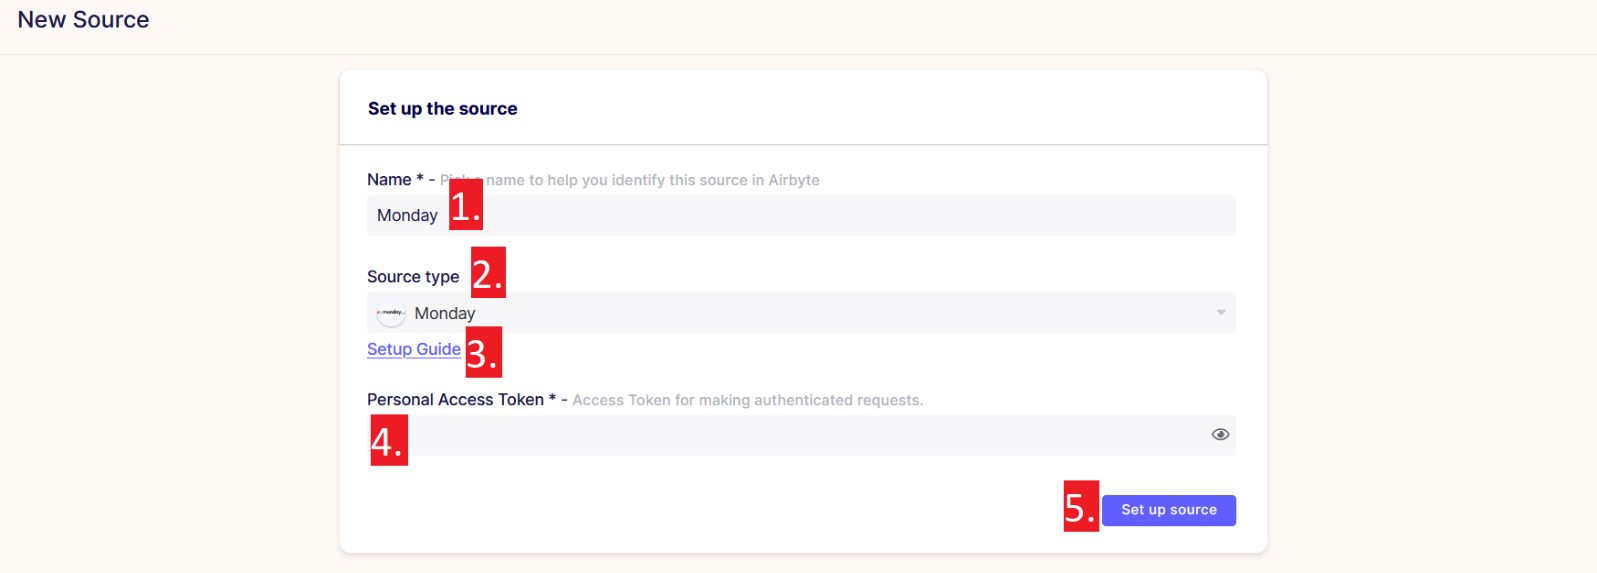
- Name: Users can add the name of the source as per their requirements.
- Source Type: The user has to select the source type from the provided list by airbyte.
- The Setup source: it is one kind of small document which guides you to take connection properties from the vendor’s end.
- Personal Access Token: a personal access token is a string of characters that can be used to authenticate a user when accessing a computer system instead of the usual password. the access token is provided by the Monday.com
- Set up source button: By clicking on this button, the user can test the connection and also add it at the same time, the user doesn’t need to add or test the connection at different places.
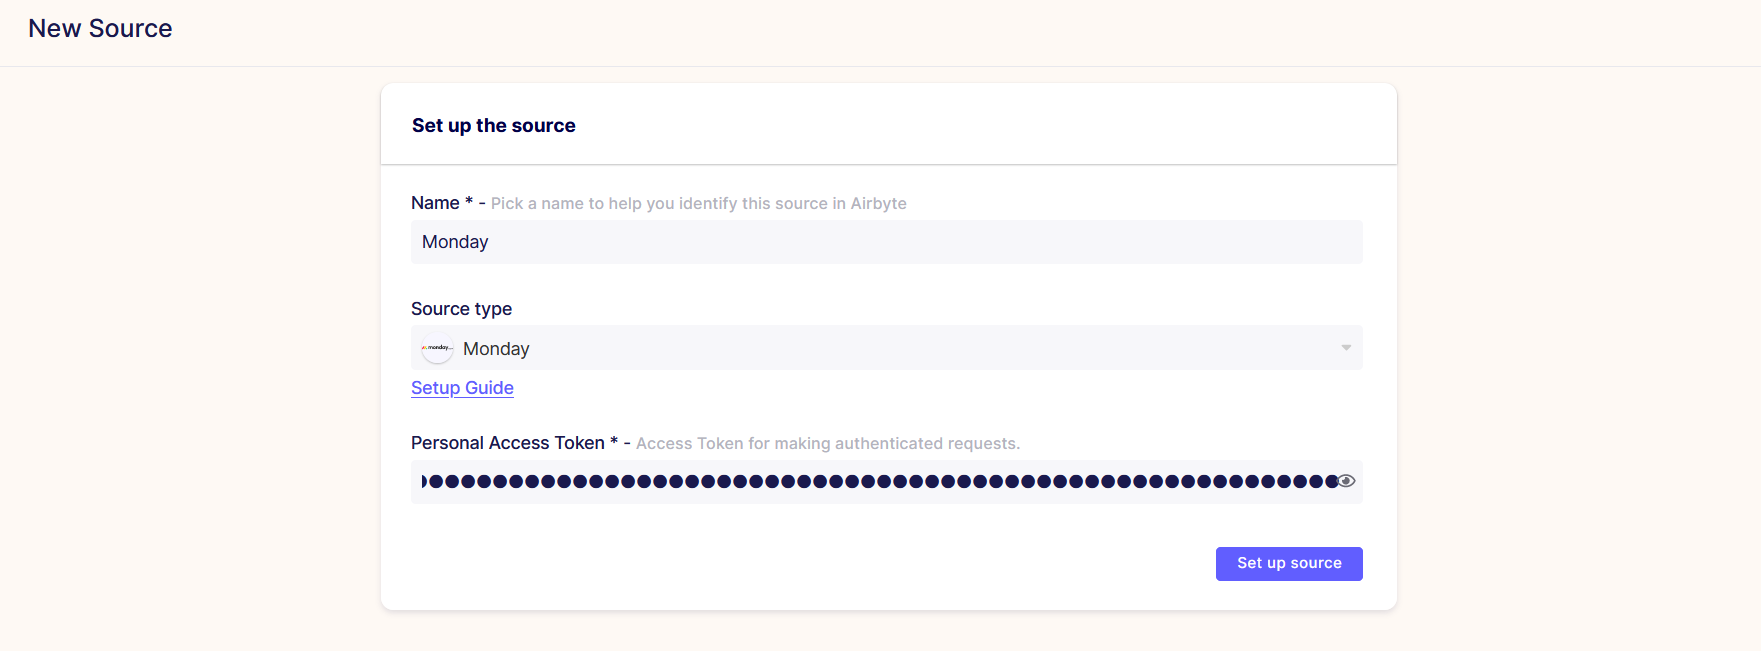
- Now, set up the source here, • Add the name as Monday, • Select Monday from the source, • Add Personal Access Token in the form, • Validate your form with as shown in the figure below:
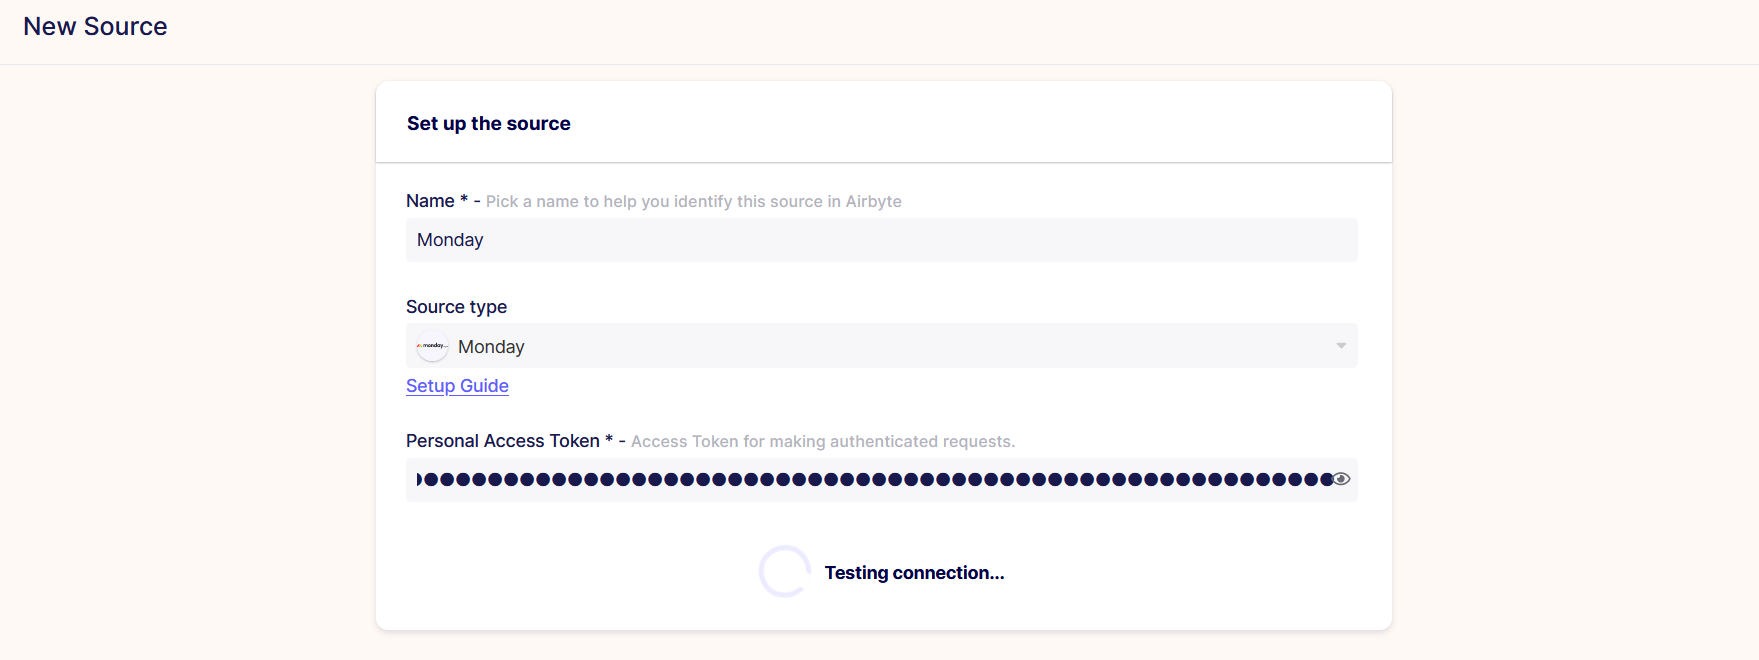
• Now click on Set up Connection, it will test the connection here, then it will redirect to add destination of the source, as per figure below:
- After testing the connection successfully add the destination here.
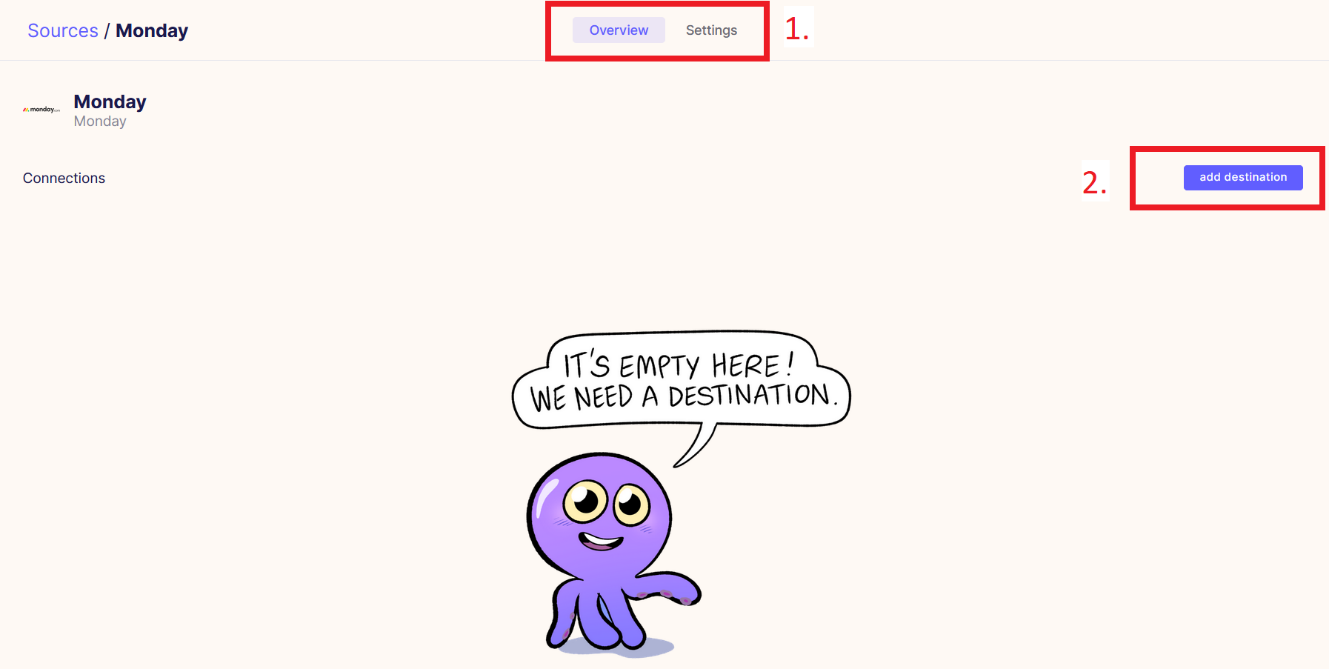
Here, on the source adding screen,
- The top-menu bar shows two buttons where 1. for Overview of the source and 2. for the settings of the source.
Overview: The overview screen shows the details related to the source; it may be empty as per the above screen.
Settings: From settings, the user can edit the form details of the added source.
- Add destination button leads us to the destination page from this source page.
- Click on the Destination from the Top-right corner, as shown in the figure below:
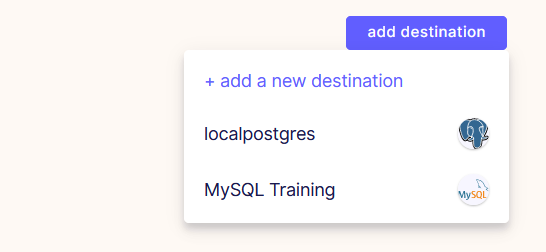
It’s will show the available destinations, here user can add the new destination as per required.
To know more about adding the required destination in Airbyte go to the Destination
- Click on the MySQL Training here. it may take some time to fetch the stream names, as shown in figure below:
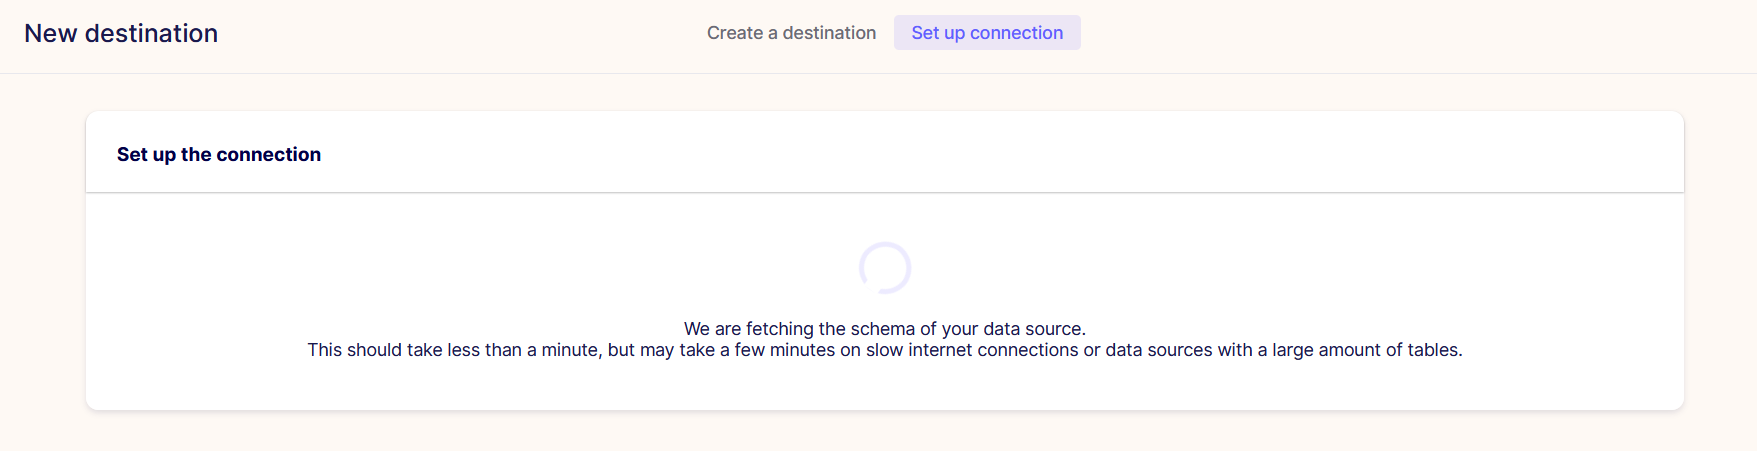
- After loading all the Streams form the Vendor’s to the destination, the destination page looks as shown in the figure below:
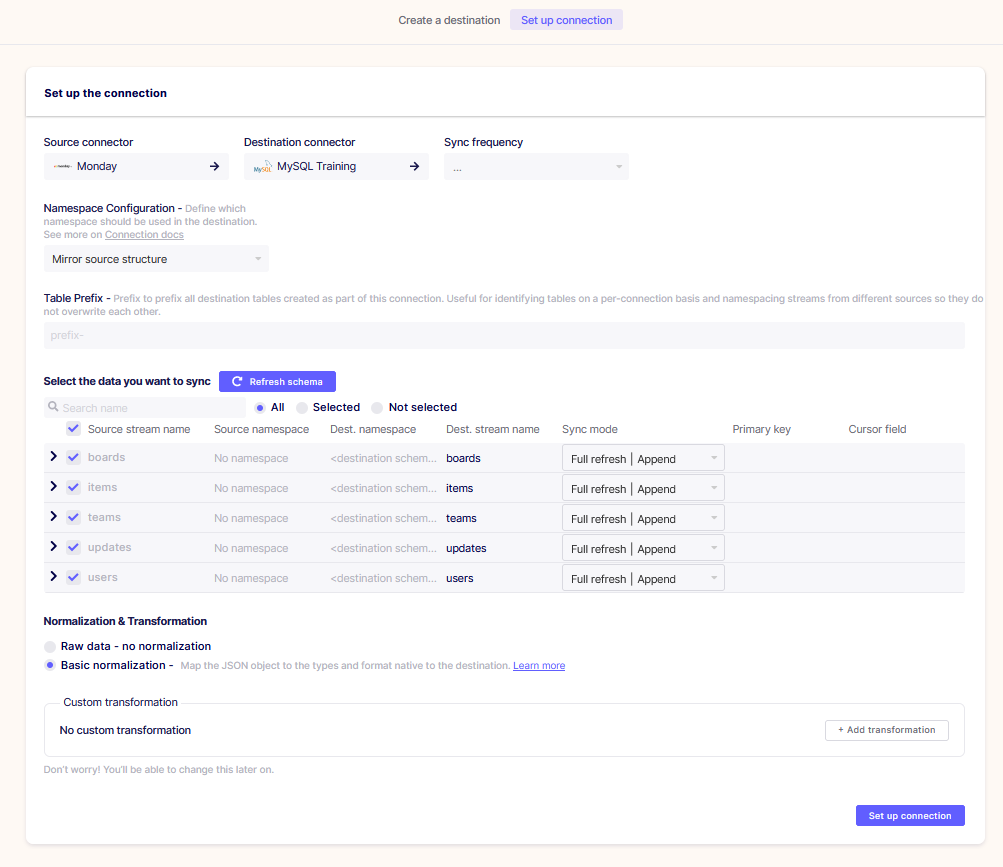
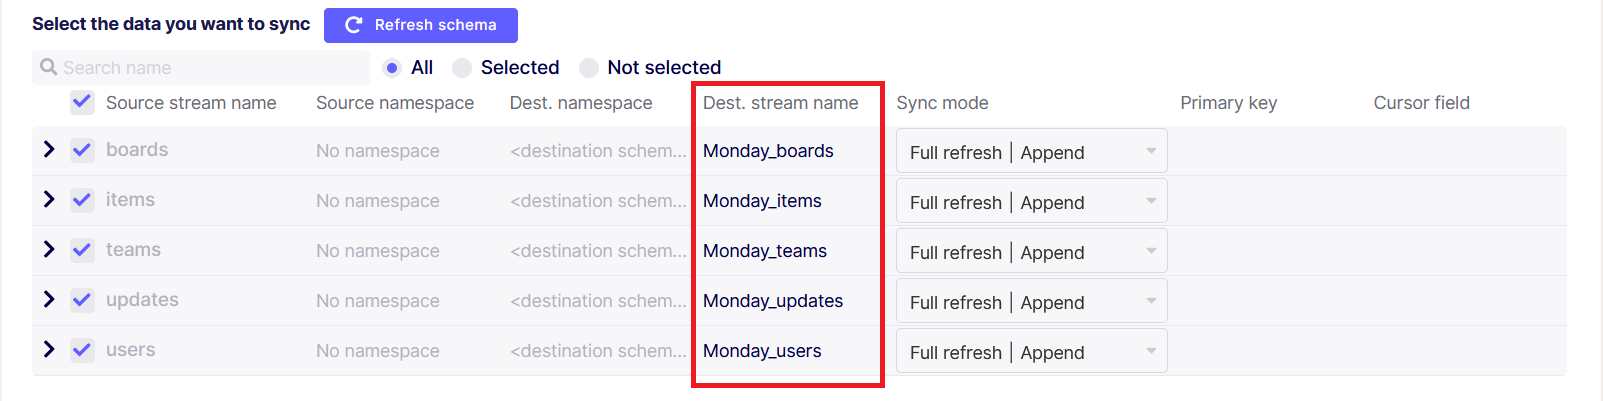
- After loading all the data streams user need to add Sync frequency and Table Prifix, as shown in the figure below:
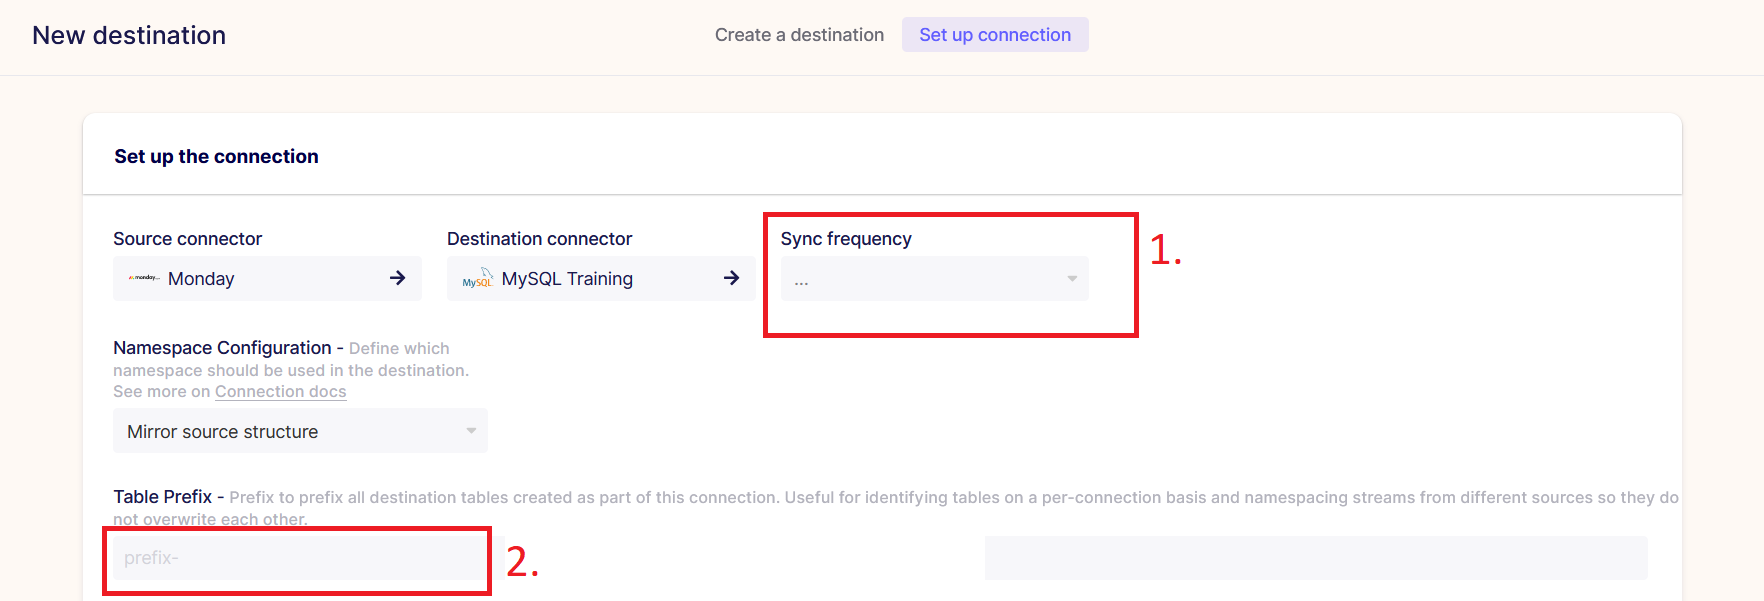
- Add Sync Frequency: Every Hour
- Add Table Prefix: Monday_
- As shown in the figure below:

• When the user add the prefix, it gets added on Destination stream name automatically, as shown in the figure below:
- At the bottom of the destination page, we have two radio buttons, which contain the Normalization option. Keep the Basic Normalization selected.
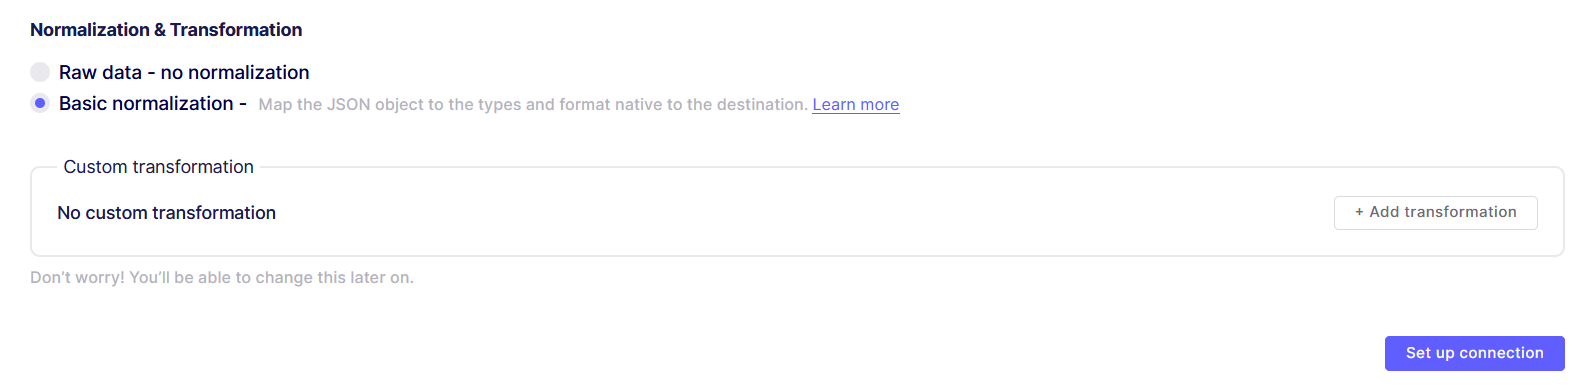
- Now, click on the setup connection to complete the connection. it will test the connection again which may take some time.
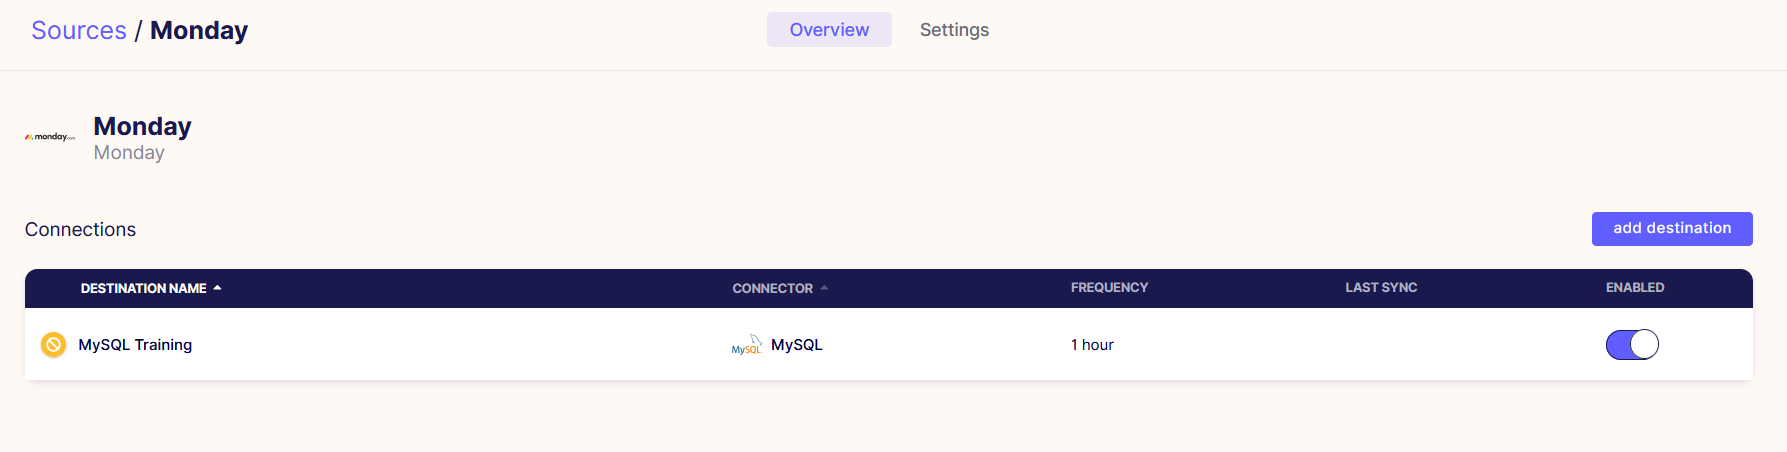
- Now, to validate the data is synced by the Airbyte, Go to the Connection from the Left menu bar of the screen:

- Find the Added connection of the Monday.com from the list,

Here, the Data isn’t synced yet, for that it shows the icon of non-sync at the start of the row. click on the row to see the details.
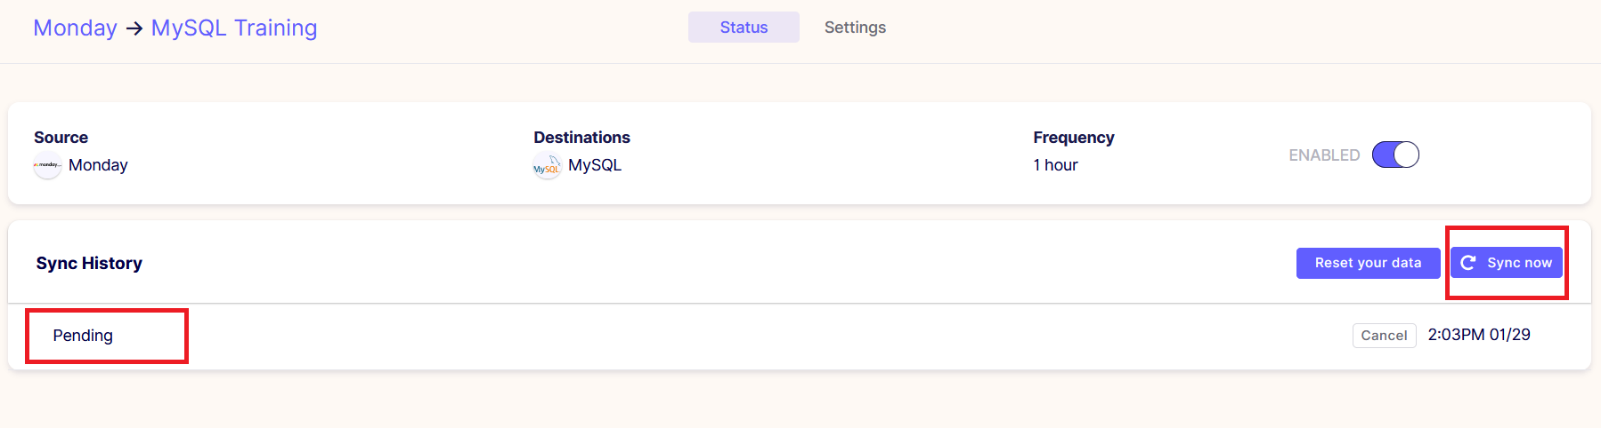
- Here the Monday connection page will show the Status of the data sync and sync history.
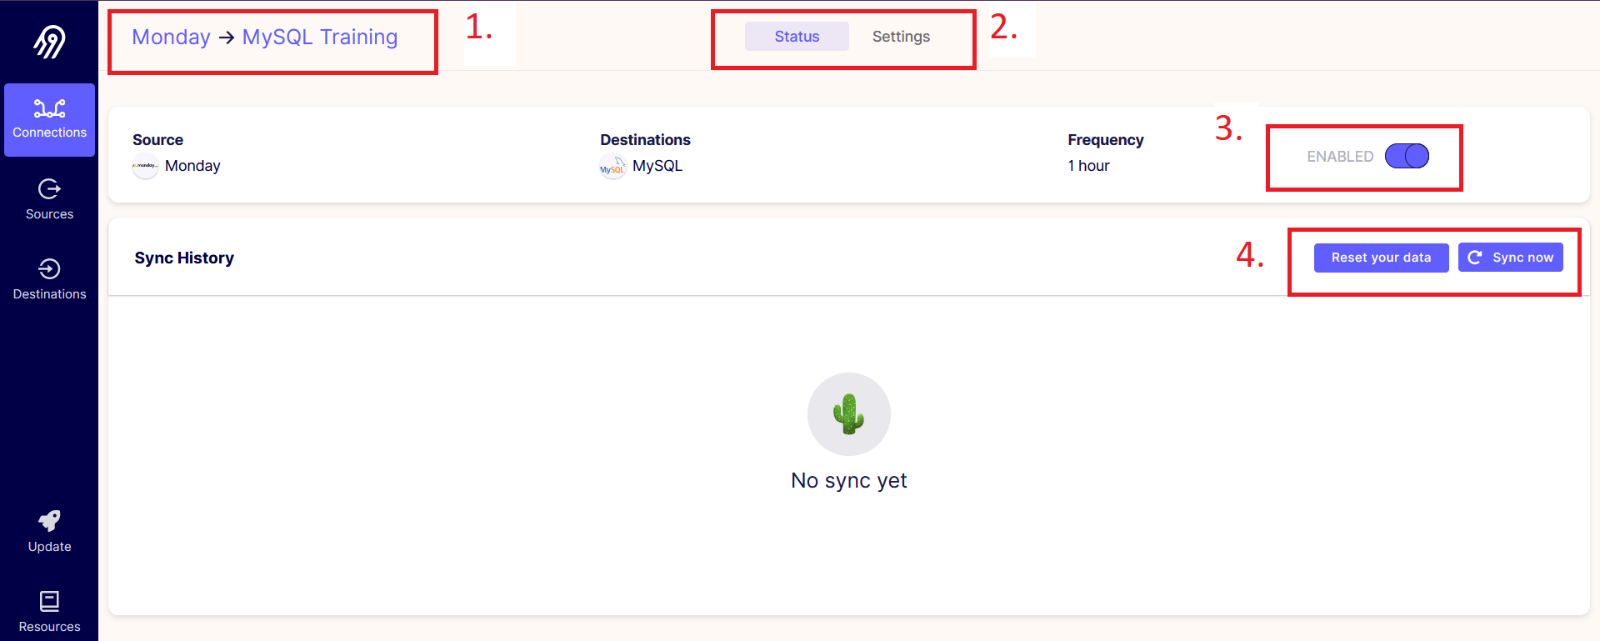
- The title of the source and destination name.
- Status and settings page top menu bar.
- Enable button: from this button, the user can enable/disable the source from the destination.
- Reset your data and Sync button: the user can reset their data and only sync the updated data from the vendor.
- Click on the sync button to sync the data manually, after clicking on the sync button it will start the process which will indicate the status under the history grid as shown in the figure below:
Once it gets completed it will indicate as the Succeeded under the history, as it will also indicate the size of data records number and time of sync. Here we have added the sync time as every hour, on that the Airbyte will sync the data in every hour automatically which will be shown as the figure below:
